She loved the idea of GrovLink. And she wasn’t going to use it.

Jeff DentonLead Product Developer · 4 min read ·

I'm paid for 20 hours and I work 30. I love the idea, but I'm never going to use that.
Tracy runs comms at a local nonprofit and loves the idea of GrovLink. She was also very clear that she wasn’t going to use it.
That’s a pretty effective way to bring a product conversation back to earth.
She could see the value of an app for her community. She could also see who would have to keep it current. The event email was already written. The flyer was already finished. Putting the same information into GrovLink meant more work in a week that was already ten hours over.
A nicer dashboard wasn’t going to give her those hours back.
So here’s the part I’m excited about: you can now add content to GrovLink without opening GrovLink. Ask the AI you already use for your other work, right in the same conversation.
GrovLink’s new MCP connection is available immediately to all subscribers. It lets a compatible AI prepare events, classes, calls to action (CTAs), volunteer opportunities, microlearning content, and impact stories. They arrive as drafts for you to review before they go live.
This is part one of a series about “I don’t have time to manage another system.” Tracy gave us a very good place to start.
What’s an MCP server?
MCP stands for Model Context Protocol. It’s a shared way for AI tools to connect to other software. An MCP server makes specific capabilities available through that connection, such as creating a draft or finding an existing item.
For GrovLink, think of it as giving your AI a way to put the announcement into the app for you. You don’t need to run a server yourself. GrovLink hosts it; you connect your account.
Curious about other connections? Browse the official MCP Registry. Check each service’s instructions and compatibility with your AI. A listing doesn’t mean every AI platform supports it.
Connect the places your work lives
Your AI needs access to both GrovLink and the source material.
To use an email, connect Gmail. To draw from Asana or your CRM, connect that service too, if a supported connector exists. Each connection has its own permissions. Connecting GrovLink doesn’t automatically give your AI access to those other accounts.
For a document on your computer, upload it or use a desktop AI tool that supports file access and give it access to the relevant file or folder. Simply installing a desktop app doesn’t provide that access.
Once those pieces are connected, the request can sound like ordinary work:
Find the email titled “Join us at our Spring Gala” and make a GrovLink event for me. Use the photo in the email as the event photo.
Or:
Find the volunteer flyer PDF we have been working on and create a new volunteer opportunity and a related CTA in GrovLink.
I’ve tested Claude with Gmail, including photos and attachments, and with a local document. What another AI can retrieve depends on its tools, so photo and attachment handling may differ.
Connect with Claude
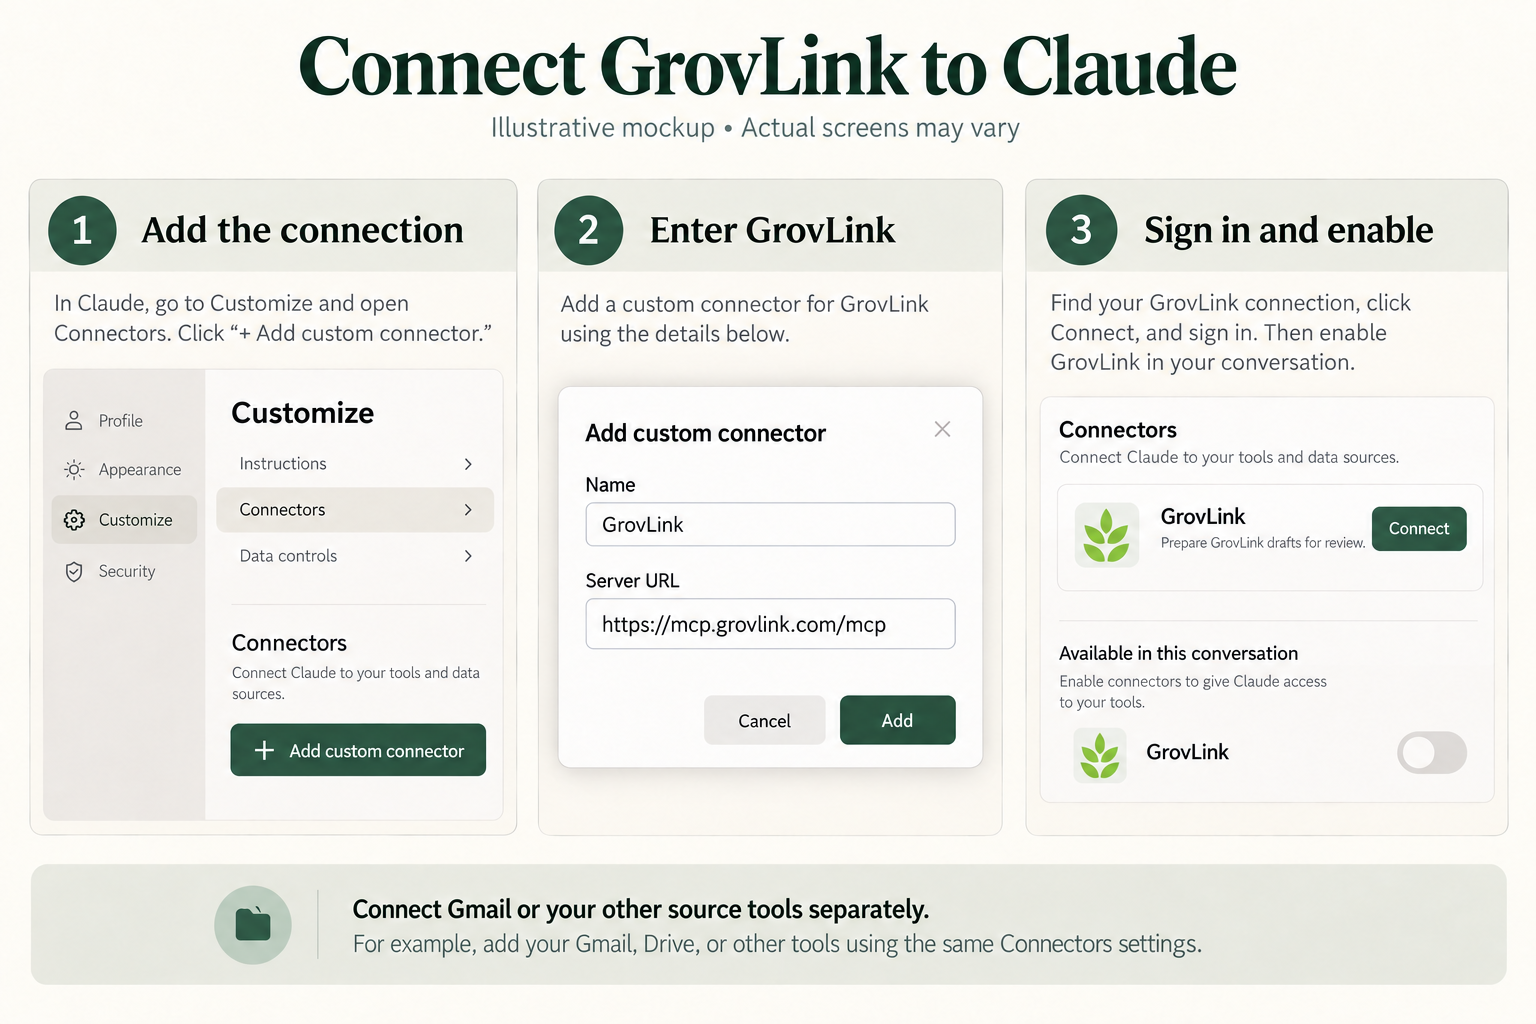
In Claude, open Customize → Connectors, choose +, then Add custom connector. Name it GrovLink and enter this server address:
https://mcp.grovlink.com/mcp
Add the connector, choose Connect, and sign in with your usual GrovLink account. You don’t need to supply a client ID or secret. In your conversation’s + → Connectors menu, enable GrovLink and the source tools you’ll use.
On Team or Enterprise accounts, an organization owner must add the connector first. See Claude’s connection instructions for current steps.
Connect with ChatGPT
To connect GrovLink in ChatGPT, follow OpenAI’s developer-mode instructions.
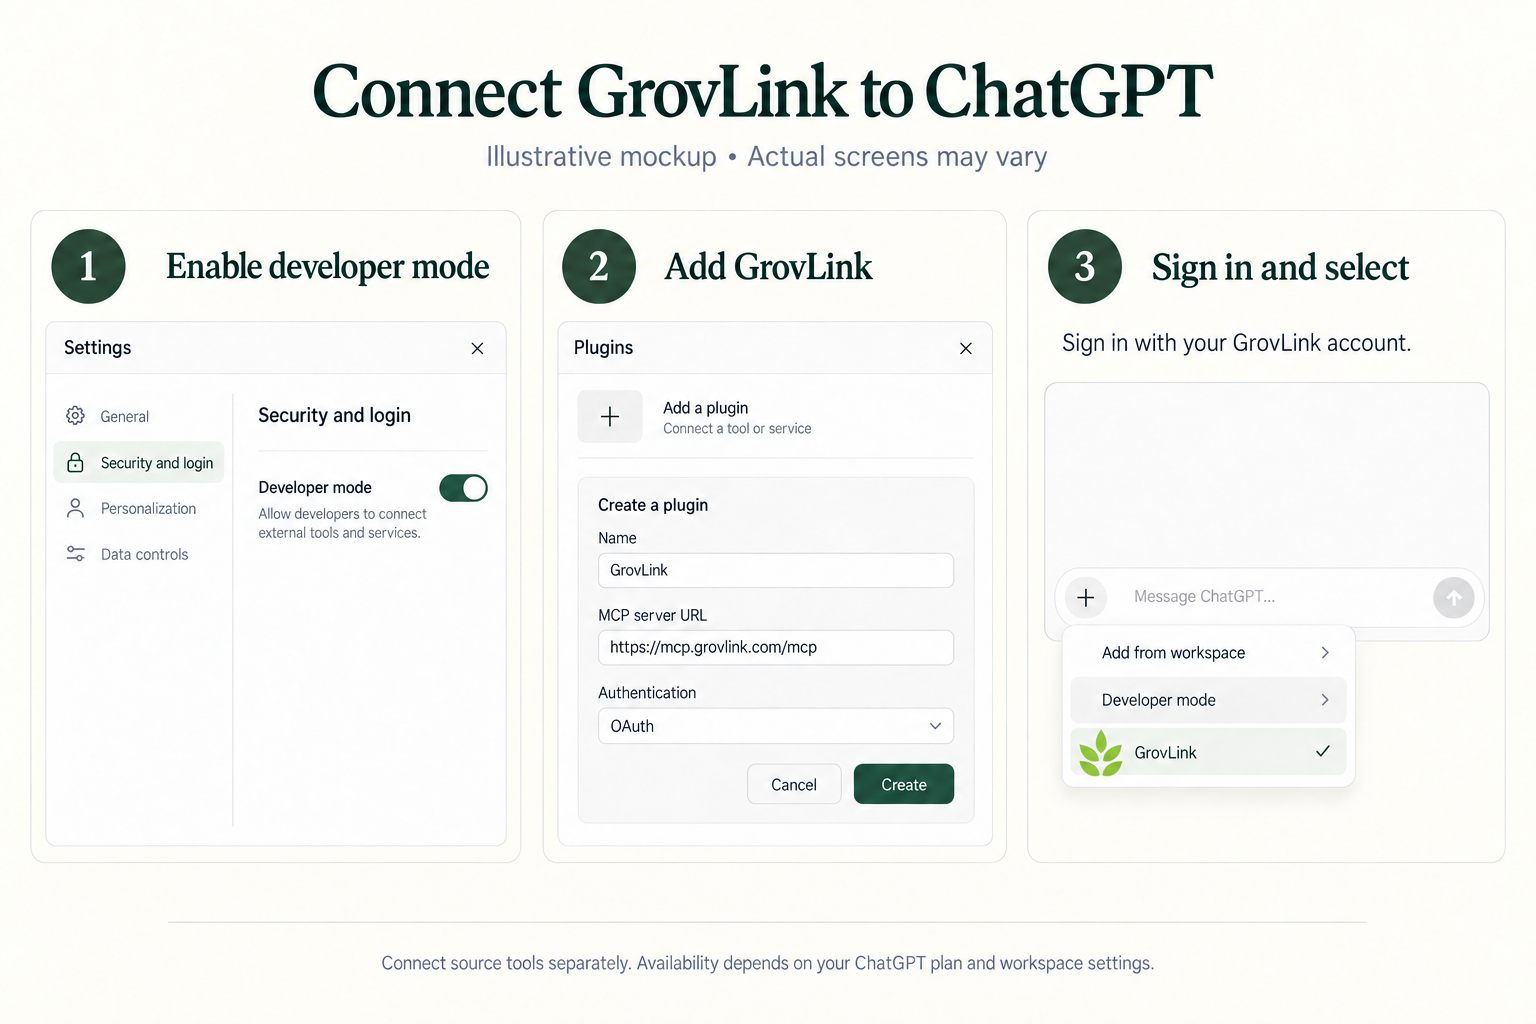
On ChatGPT’s website, open Settings → Security and login and enable Developer mode. Open Plugins, select +, and create a developer-mode app named GrovLink using the same server address above. Choose OAuth authentication and follow the GrovLink sign-in prompts.
In a conversation, open + → Developer mode and select GrovLink. Connect and select your source tools separately. OpenAI lists this feature for Plus, Pro, Business, Enterprise, and Education accounts; workspace settings can affect access.
Start with one announcement
Pick an email or document you’ve already finished. Ask your connected AI to turn it into a GrovLink draft, then follow the review link it returns.
Check the date, location, wording, photo, and where the call to action leads. Fill in anything missing. The connection stages content; it doesn’t publish it automatically.
You still decide what your community should see. But you can begin that decision with the announcement already in front of you, instead of another empty form.